Postman Collection

Postman is an application used for API testing. It is an HTTP client that tests HTTP requests, utilizing a graphical user interface, through which we obtain different types of responses that need to be subsequently validated.
Public Postman workspace allows you to easily test the types of responses you get with each HTTP method. In the following lines, you'll learn how to install and configure Datanomik collection for Postman.
Configuration Steps
Install the Postman app for your Operating System and log into/create your Postman account.
Fork collection
Go to Datanomik´s Postman workspace and click on "Watch". This way, you will be automatically notified if we make any changes to the collection and you will be able to update changes into your Fork.
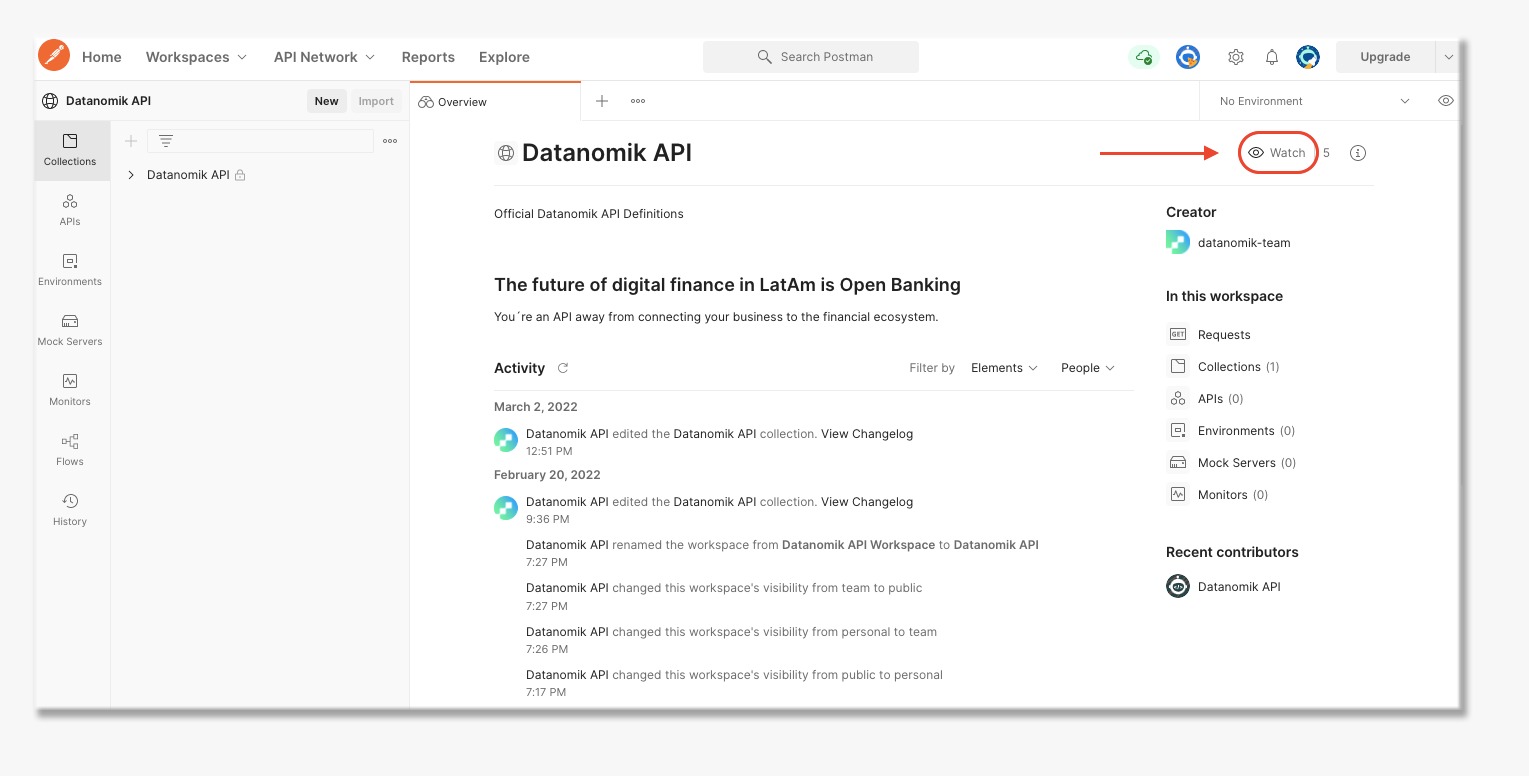
1 - Watch Collection
-
Click on Collections
-
Go to the 3 points next to Datanomik API
-
Click on Create a fork, in order to fork the collection into your own private workspace.
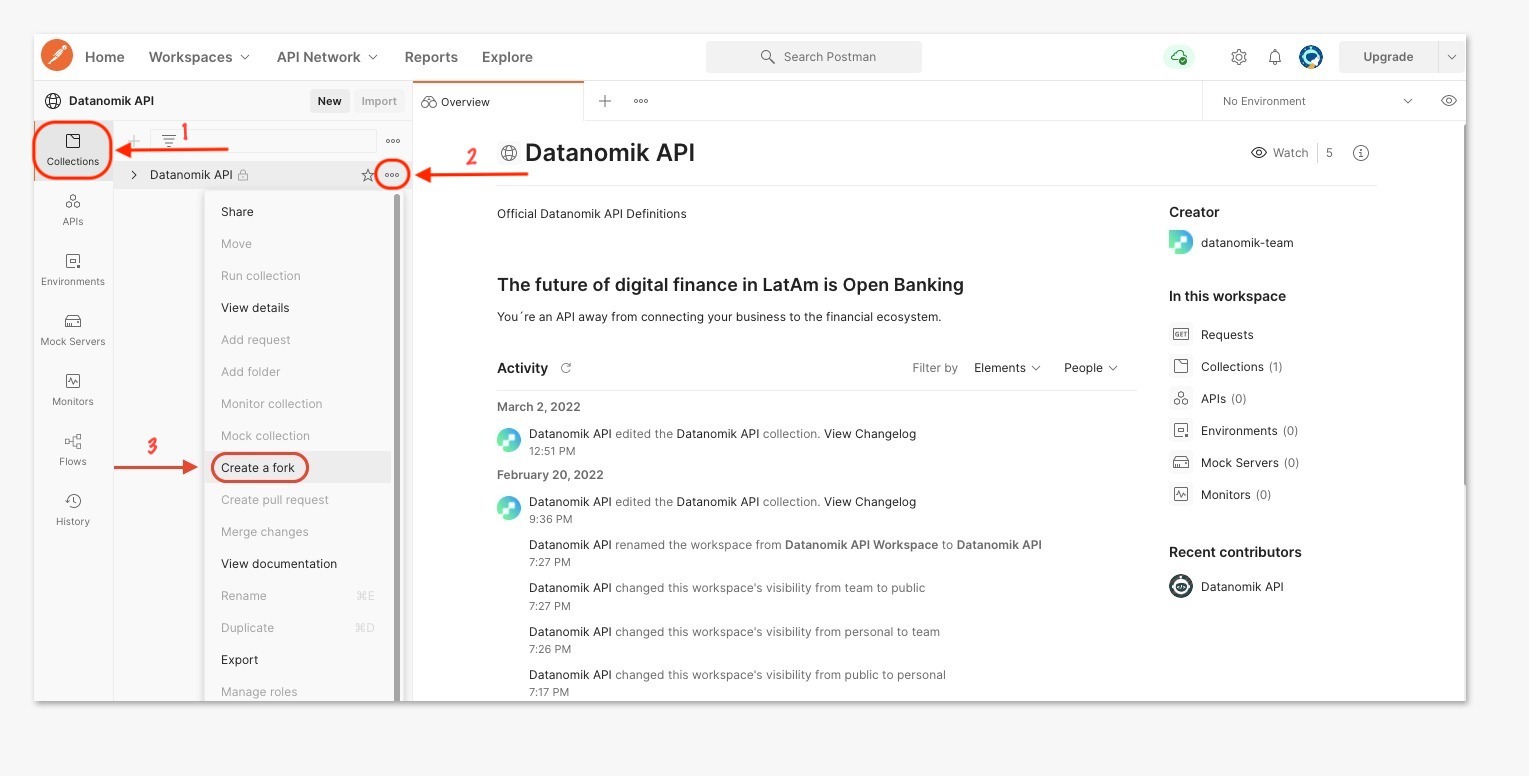
2- Fork Collection
Create environment
Postman uses environment variables to customize the requests that are sent.
To create your environment variables, in Postman:
- In Postman's left sidebar, click "Environments" and then "New Environment" option.
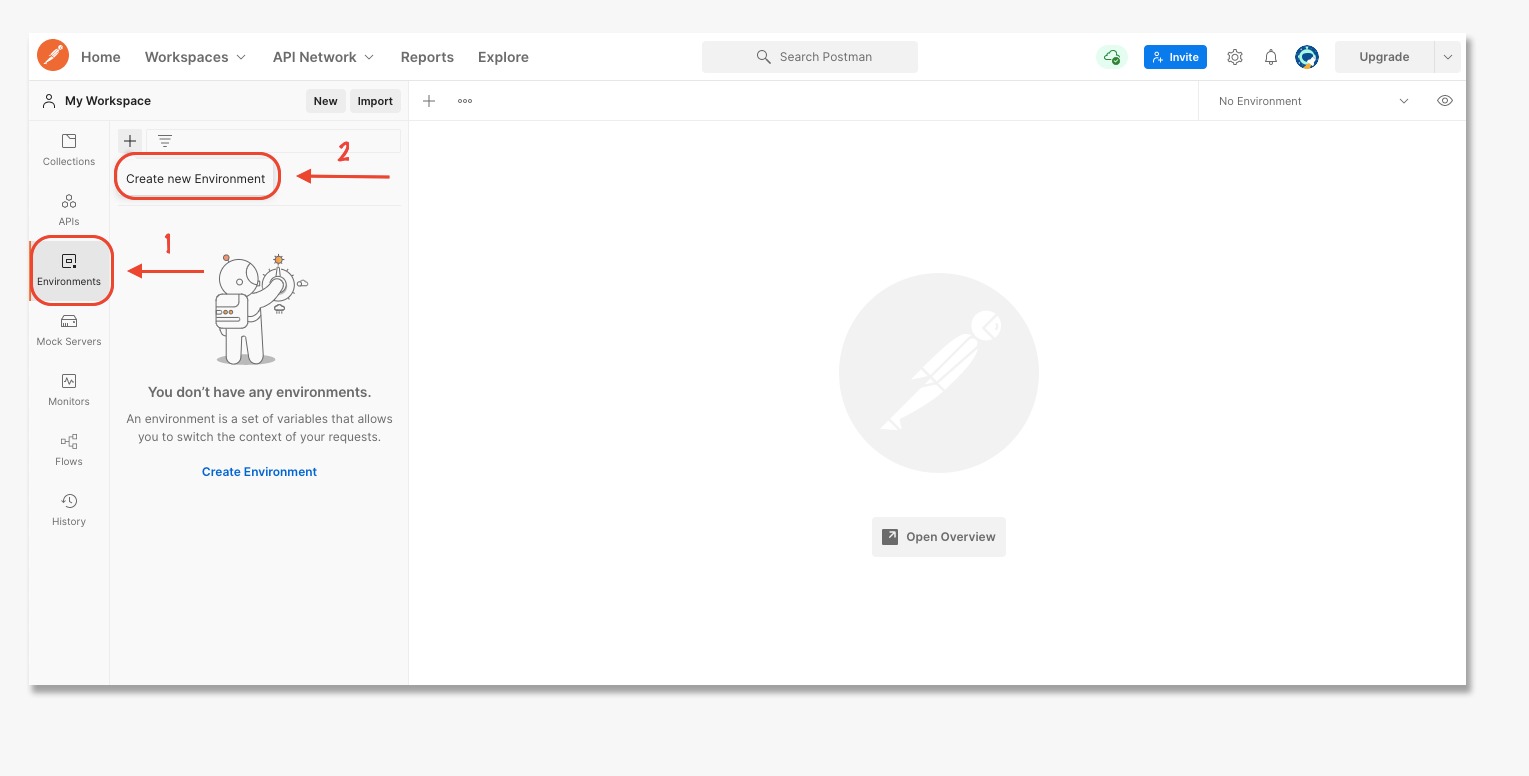
3 - Create Environment
-
Set name for your Environment, for example "Datanomik Staging" or "Datanomik Production".
-
Add the following environment variables:
-
baseUrl:
a) For Sandbox environment: https://api.stg.datanomik.com
Where you can test with dummy data for unlimited development.
or
b) For Production environment: https://api.datanomik.com
Where you can test with real credentials and institutions. -
secretId: Secret Key Id of the environment that you are testing.
-
secretPassword: Secret Key Password of the environment that you are testing.
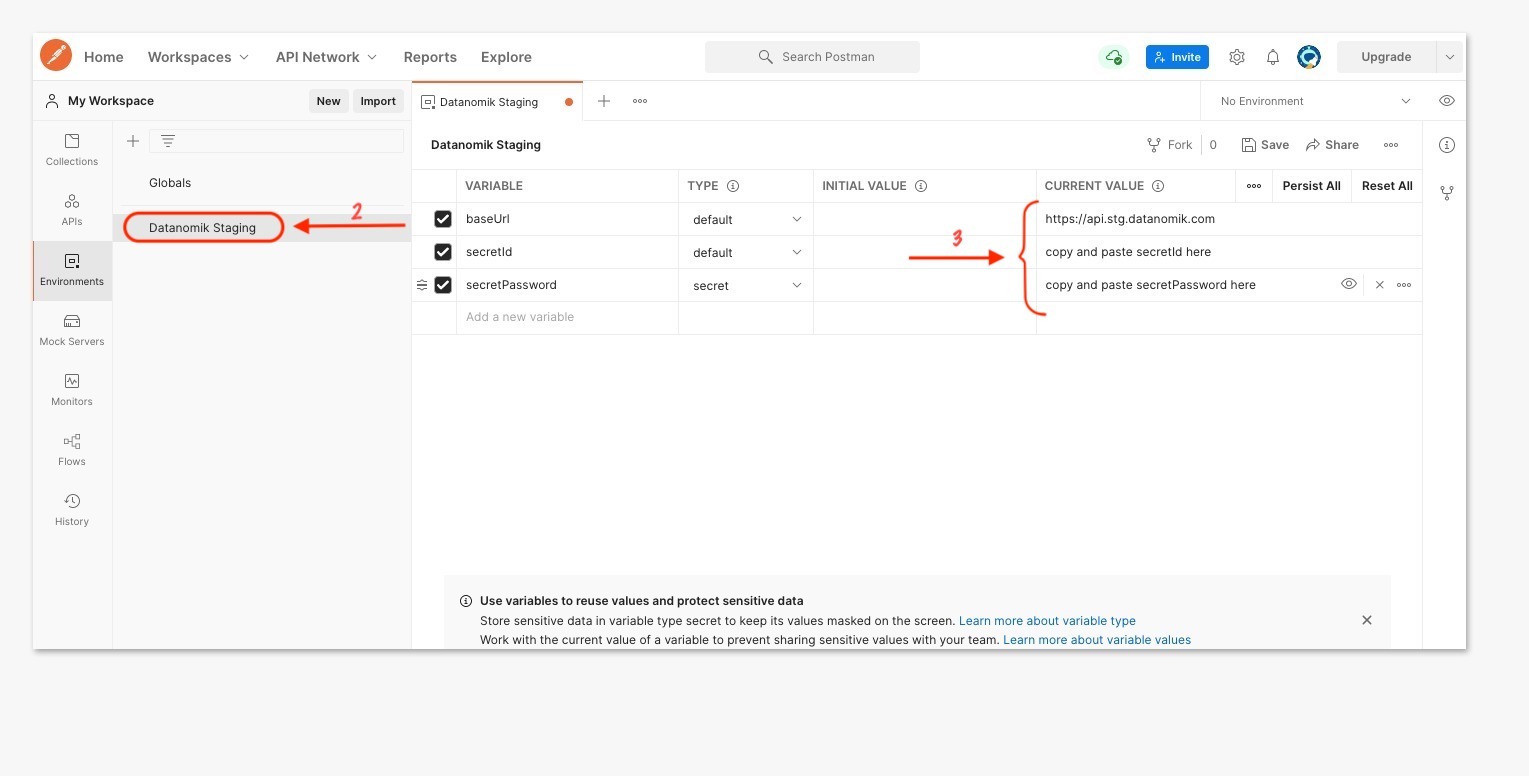
4 - Environment Variables
- Click -> Save.
Testing collection
- Go to Collections in your local workspace and select your Datanomik forked collection.
To see which Institutions are covered and how to write them as variables:
-
Inside Datanomik collection open Institutions folder and click on "List Institutions".
-
Select your Datanomik environment.
-
Click Send.
- If you click on list institutions you will receive the list of institutions covered by Datanomik.
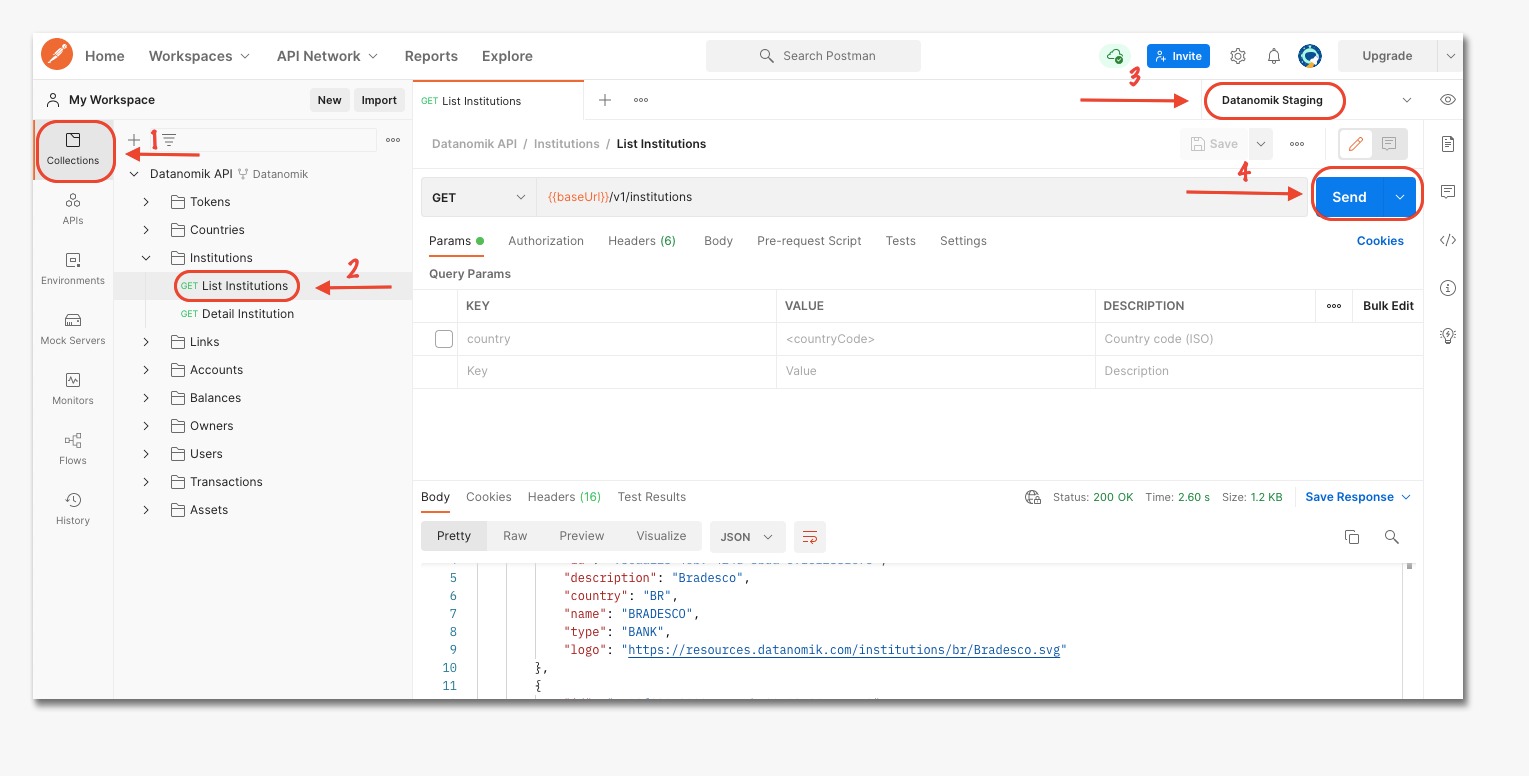
5 - Testing Collection
The first thing you have to do to connect to your account is to create a link. In order to do so:
-
Inside Datanomik collection open Links folder and click on POST Create a link.
-
Click on Body and see how to complete the parameters explained in https://docs.datanomik.com/reference/v1items
-
Click Send.
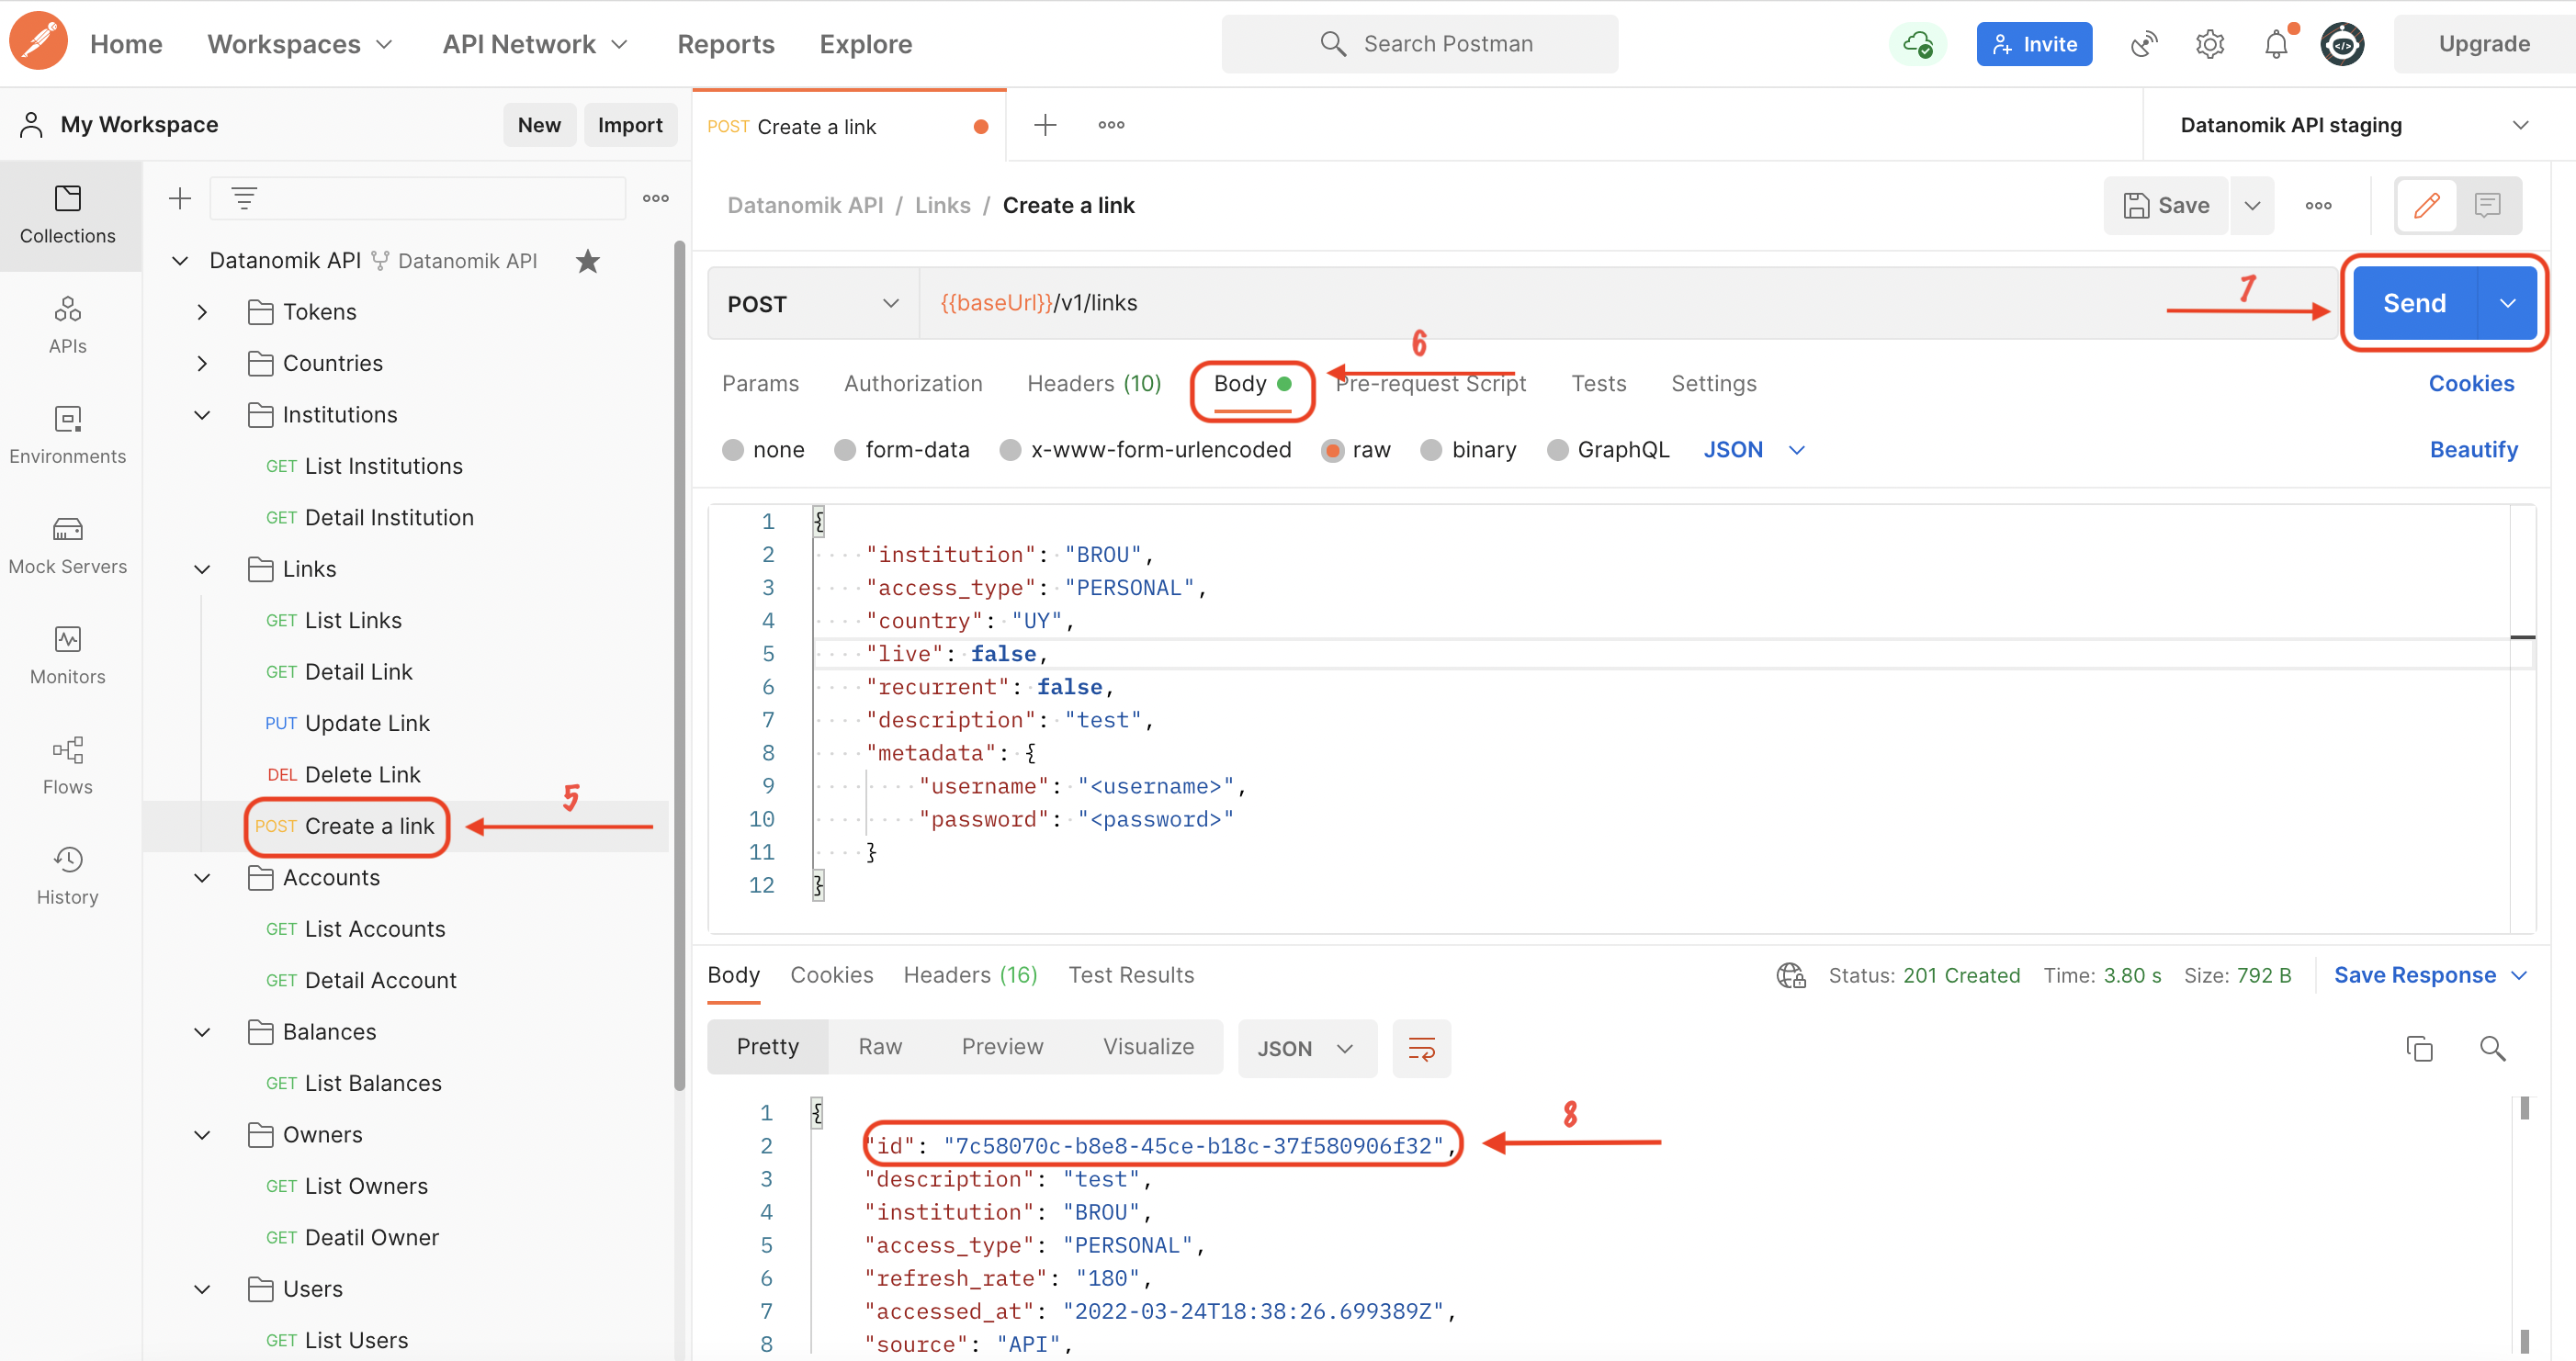
6- Create a link
-
Once de link is created you will receive a link_id as part of the response.
-
To use the rest of the endpoints you should copy the linkid and paste it in each parameter called link_id and click Send.
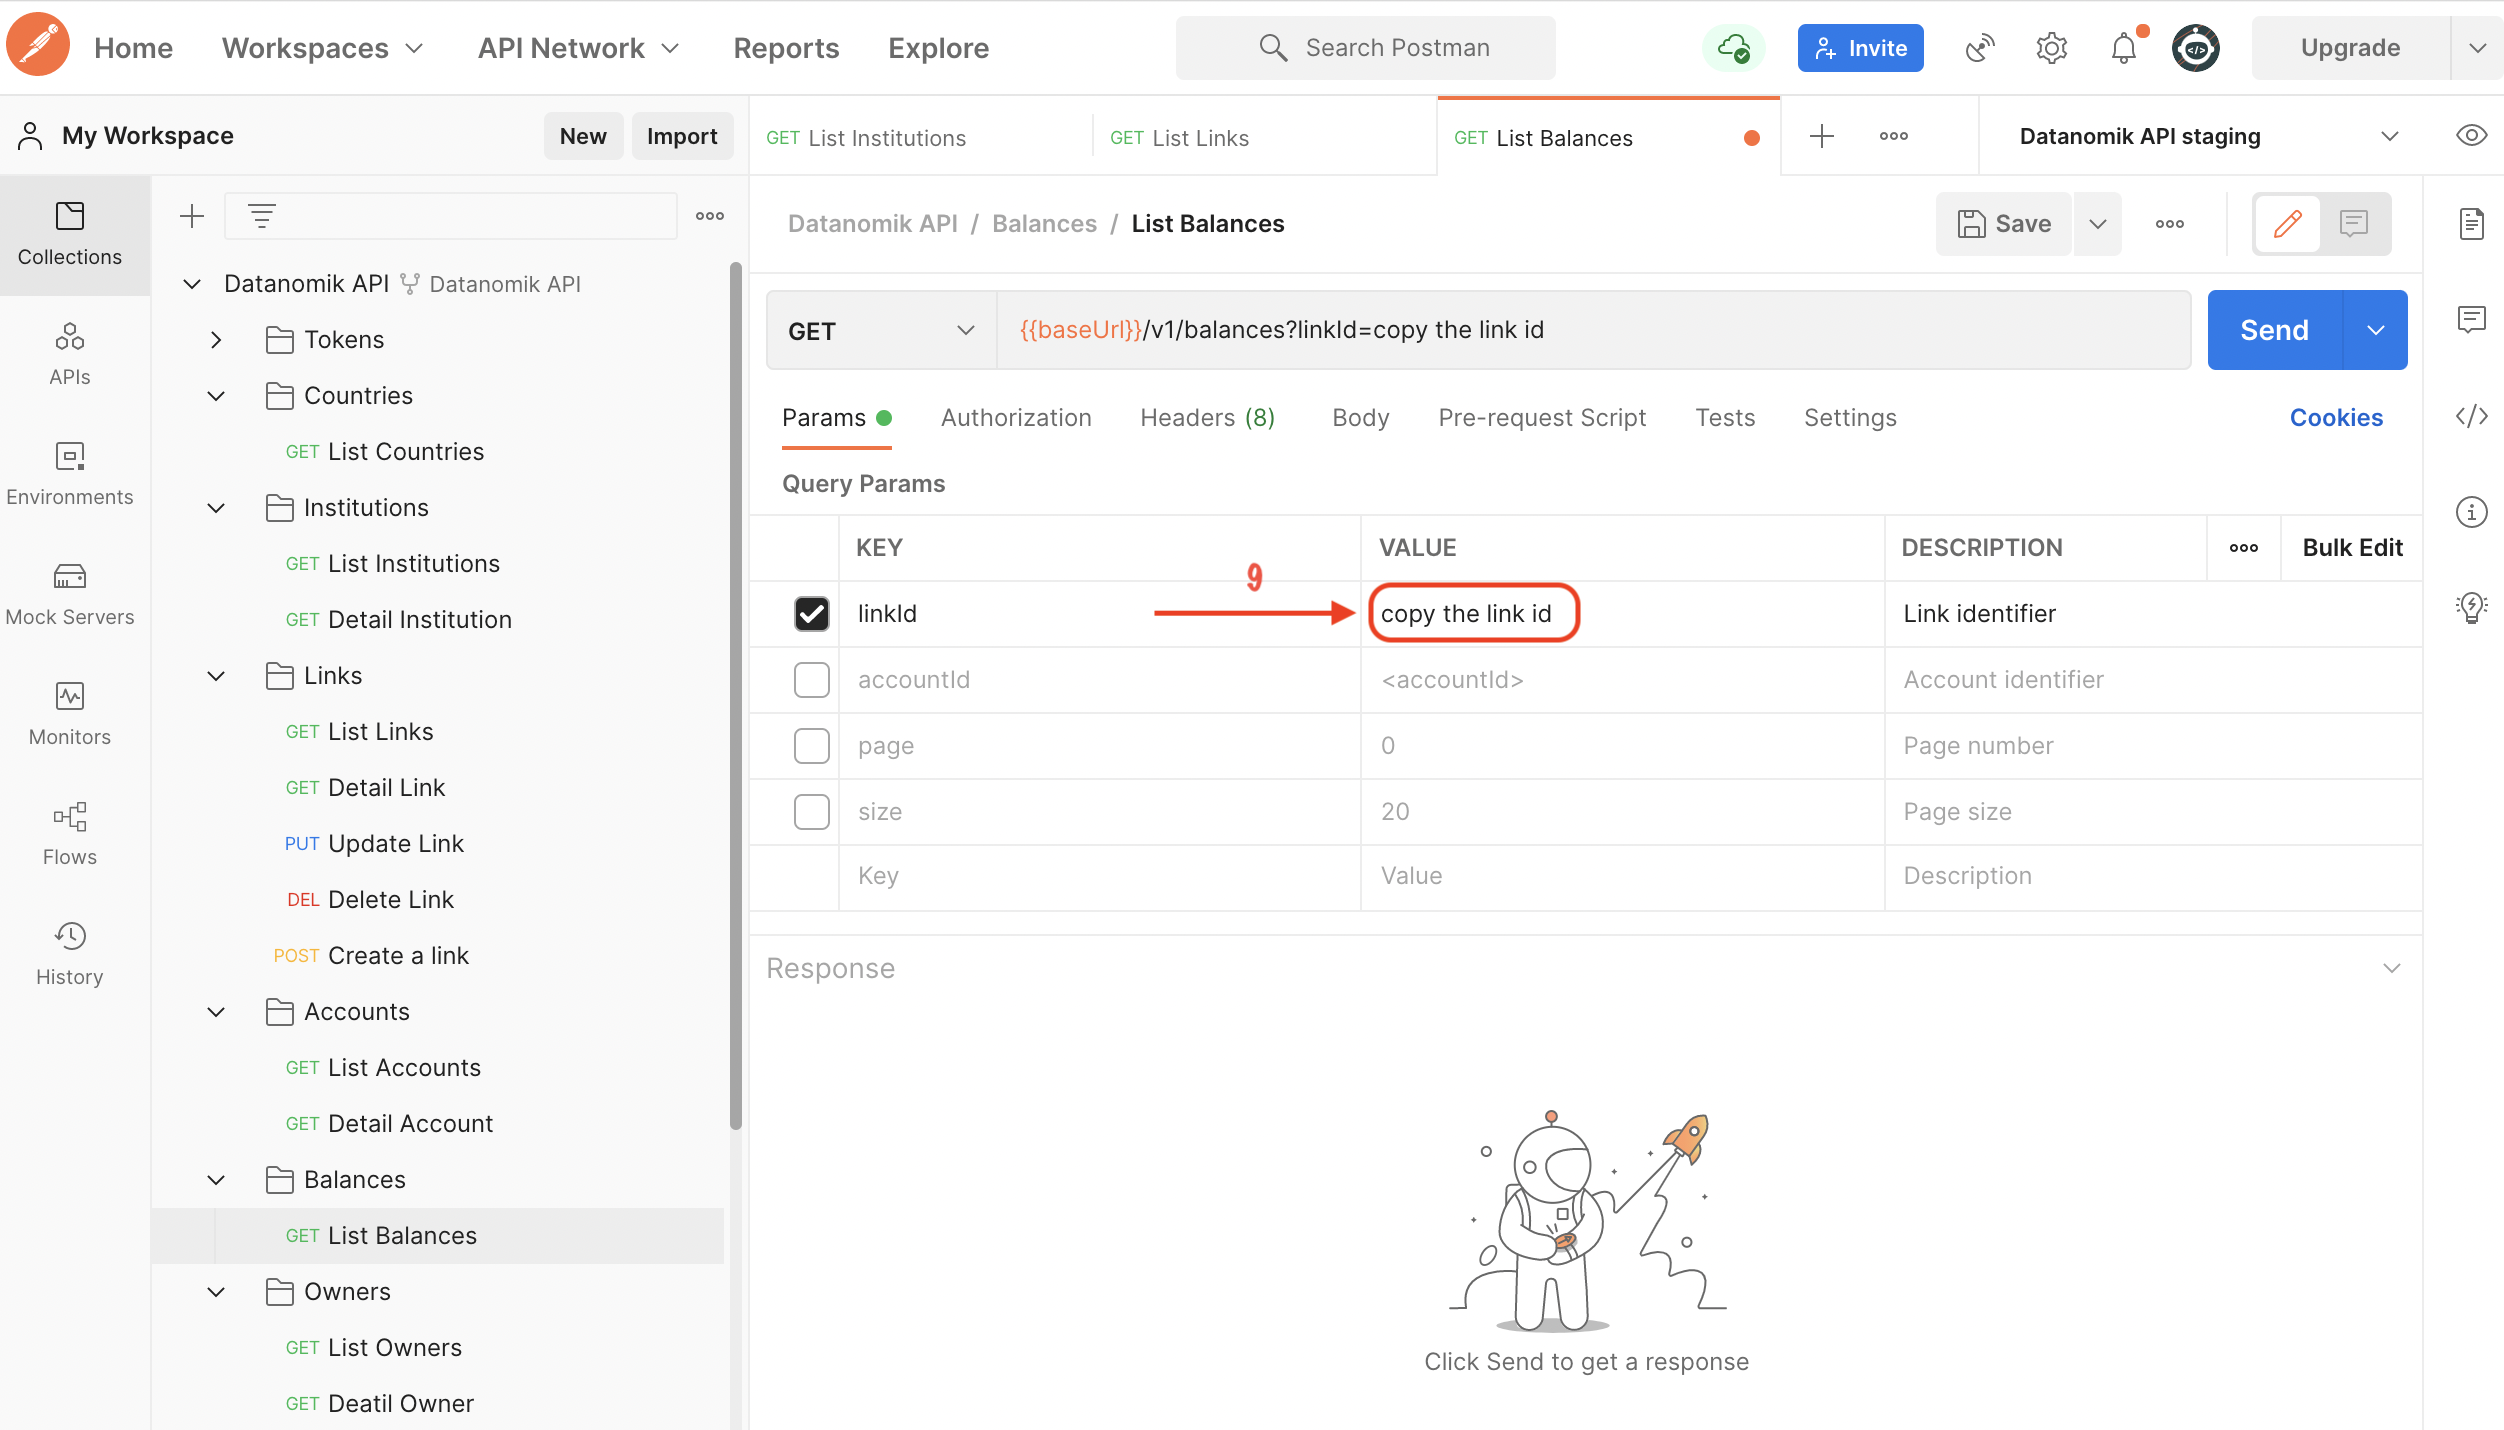
7- Send an endpoint
✳️ And you're done! Now, let's make our first calls to the Datanomik API!
Updated 3 months ago